Weight Shaper
Introducing Weight Shaper
New Update:
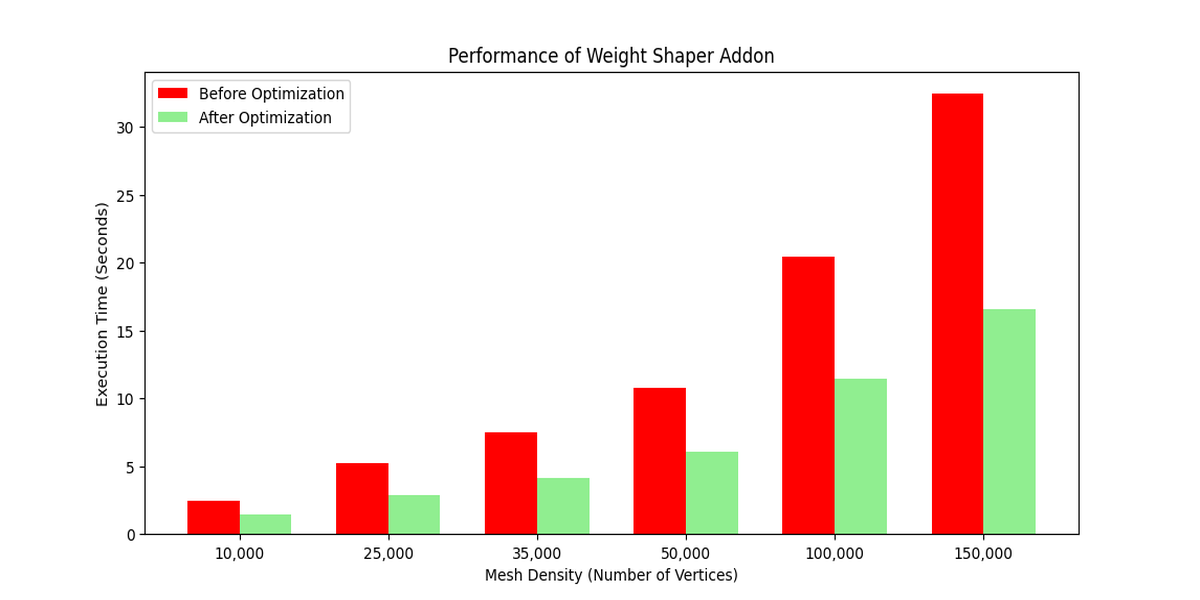
The latest version introduces significant performance improvements and more. Refer to the changelog for details and examine the performance comparison chart below.
Refine Weight Paint and Deformations with Ease
Weight Shaper is a Blender addon designed to streamline your weight painting process. It enables precise vertex adjustments for your character's deformations, automatically generating the necessary weight paint. This tool is all about efficiency and accuracy, turning hours of fine-tuning into a task that takes just minutes.
Simple Steps to Perfect Deformations
Weight Shaper simplifies the complex process of weight painting into a few intuitive steps. Whether you're a beginner or a seasoned pro, you'll appreciate the addon's straightforward approach. Here's how it works:
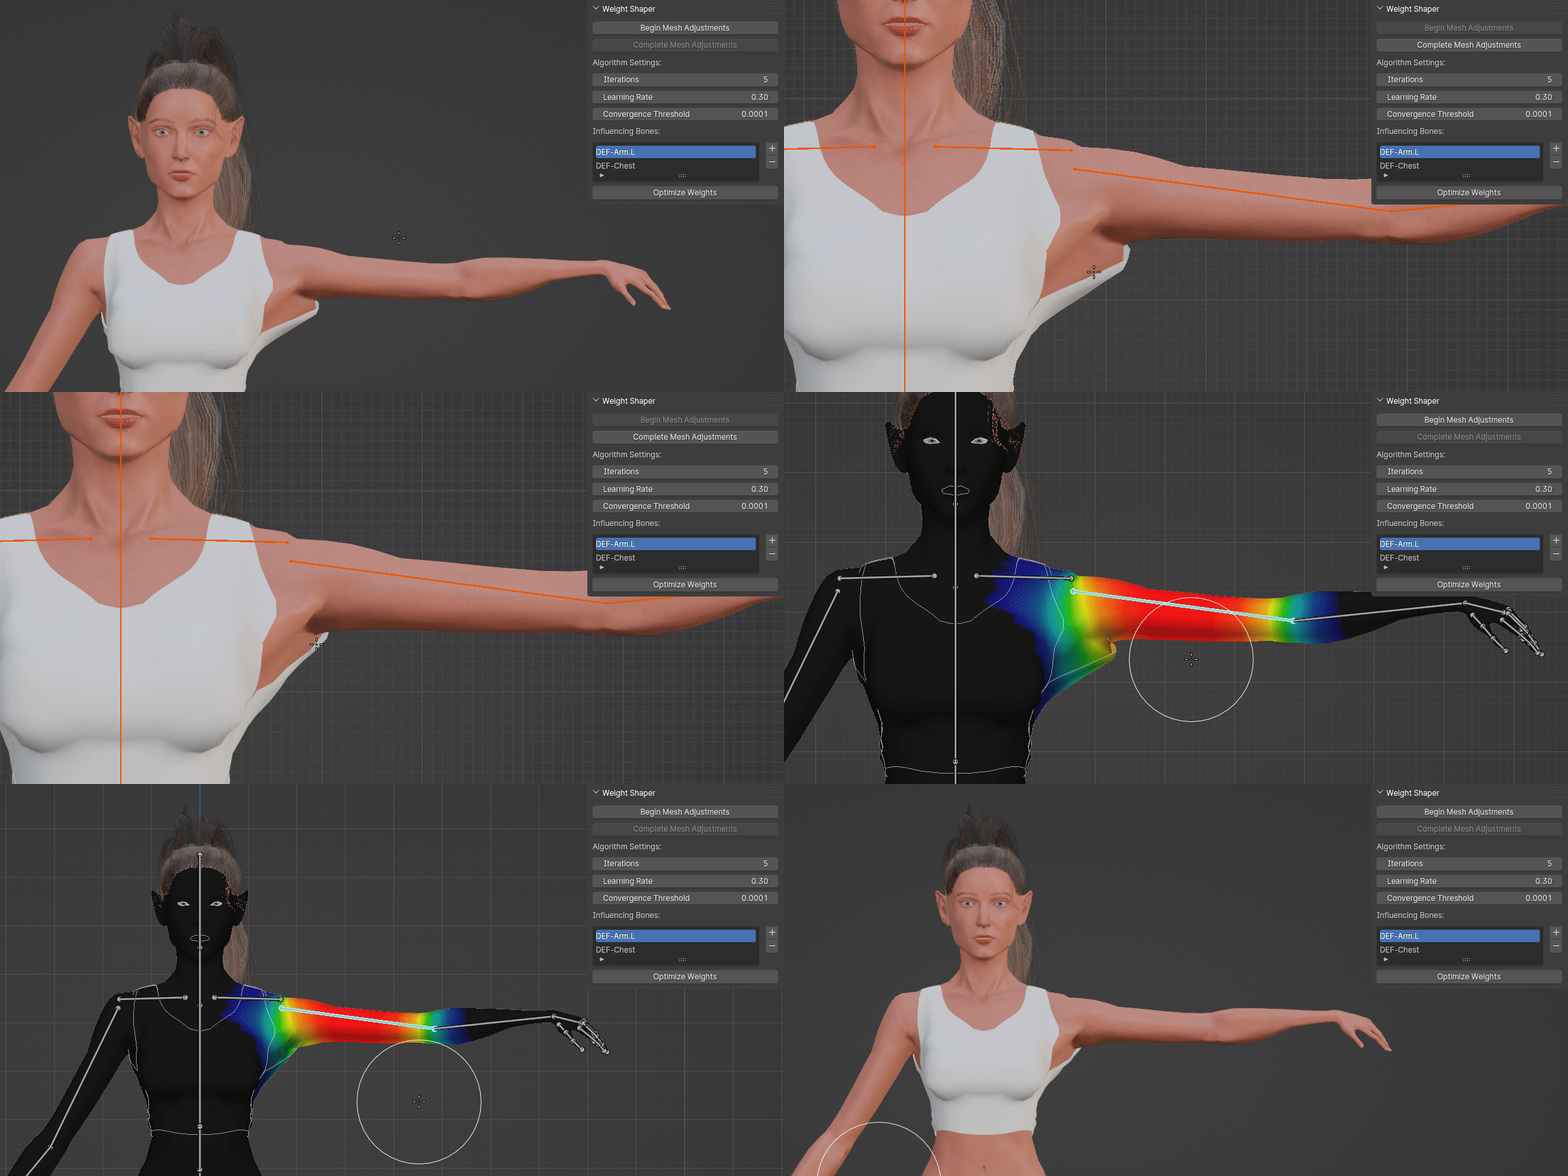
- Pose It: Position your character or object into the desired pose that requires adjustments.
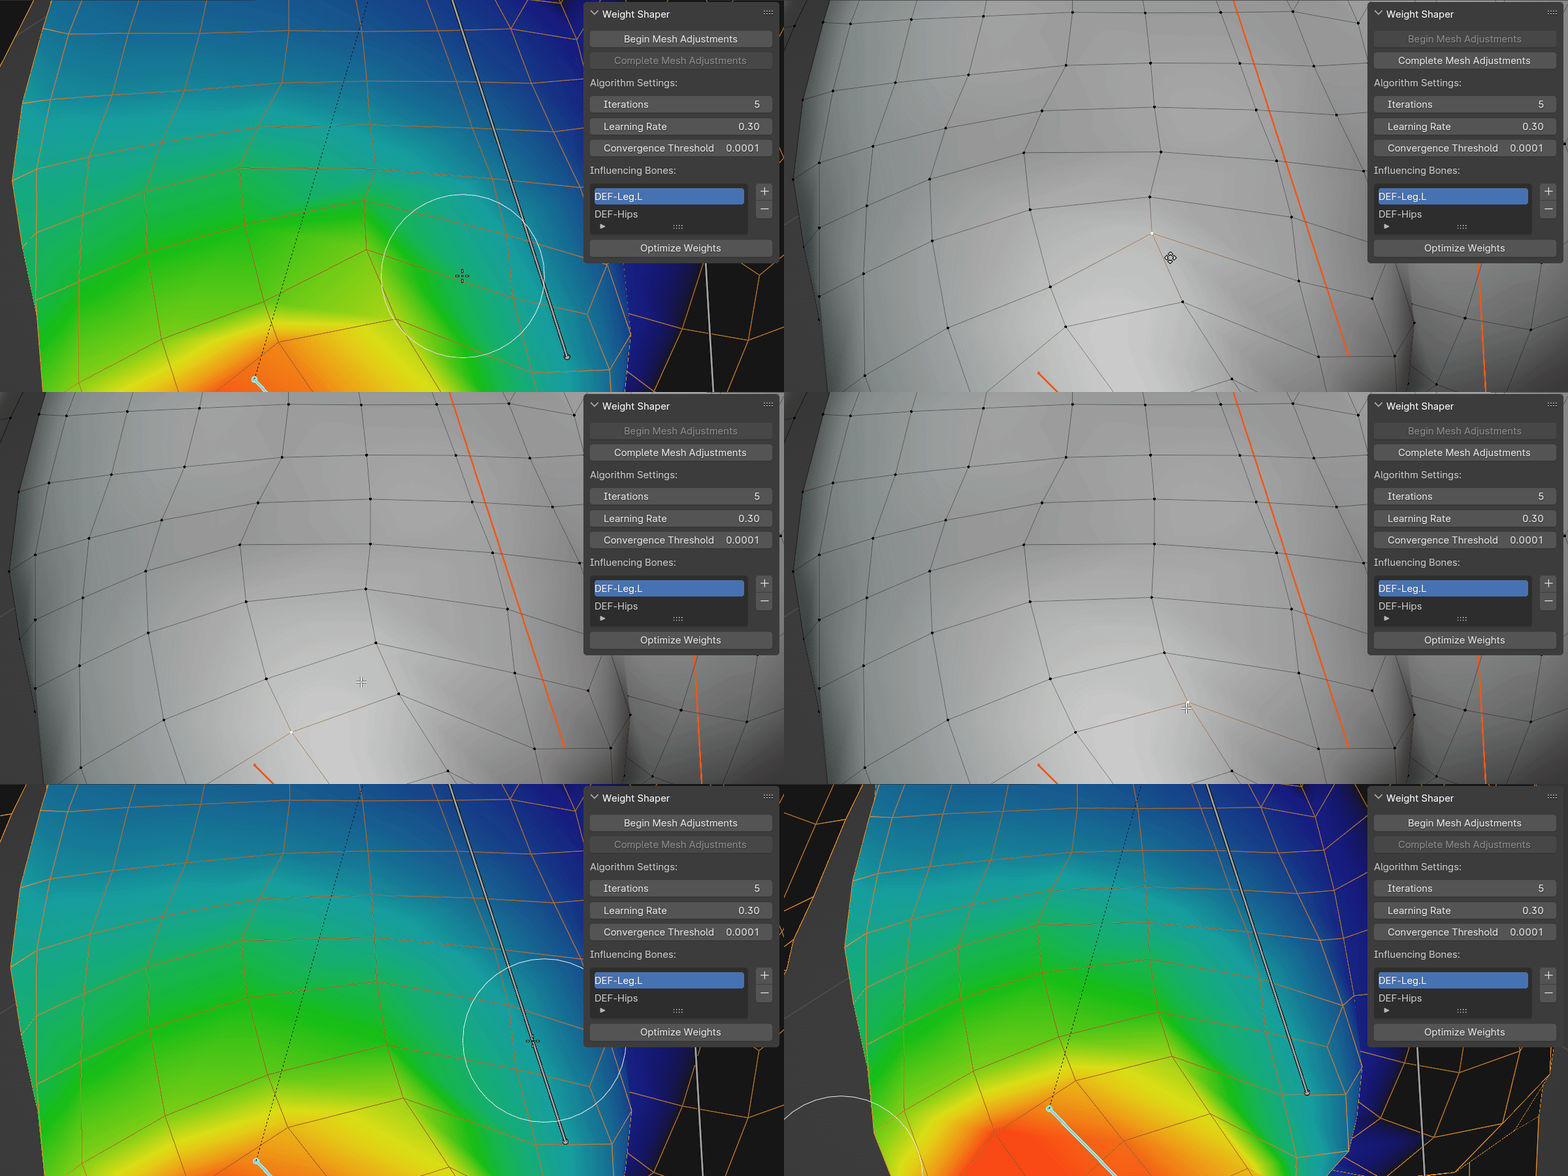
- Tweak It: In the posed state, move vertices to refine the pose to your liking.
- Perfect It: Hit 'Optimize Weights', and watch as Weight Shaper automatically generates the weight paint to seamlessly support your adjustments.
Complete Control Over Weight Distribution
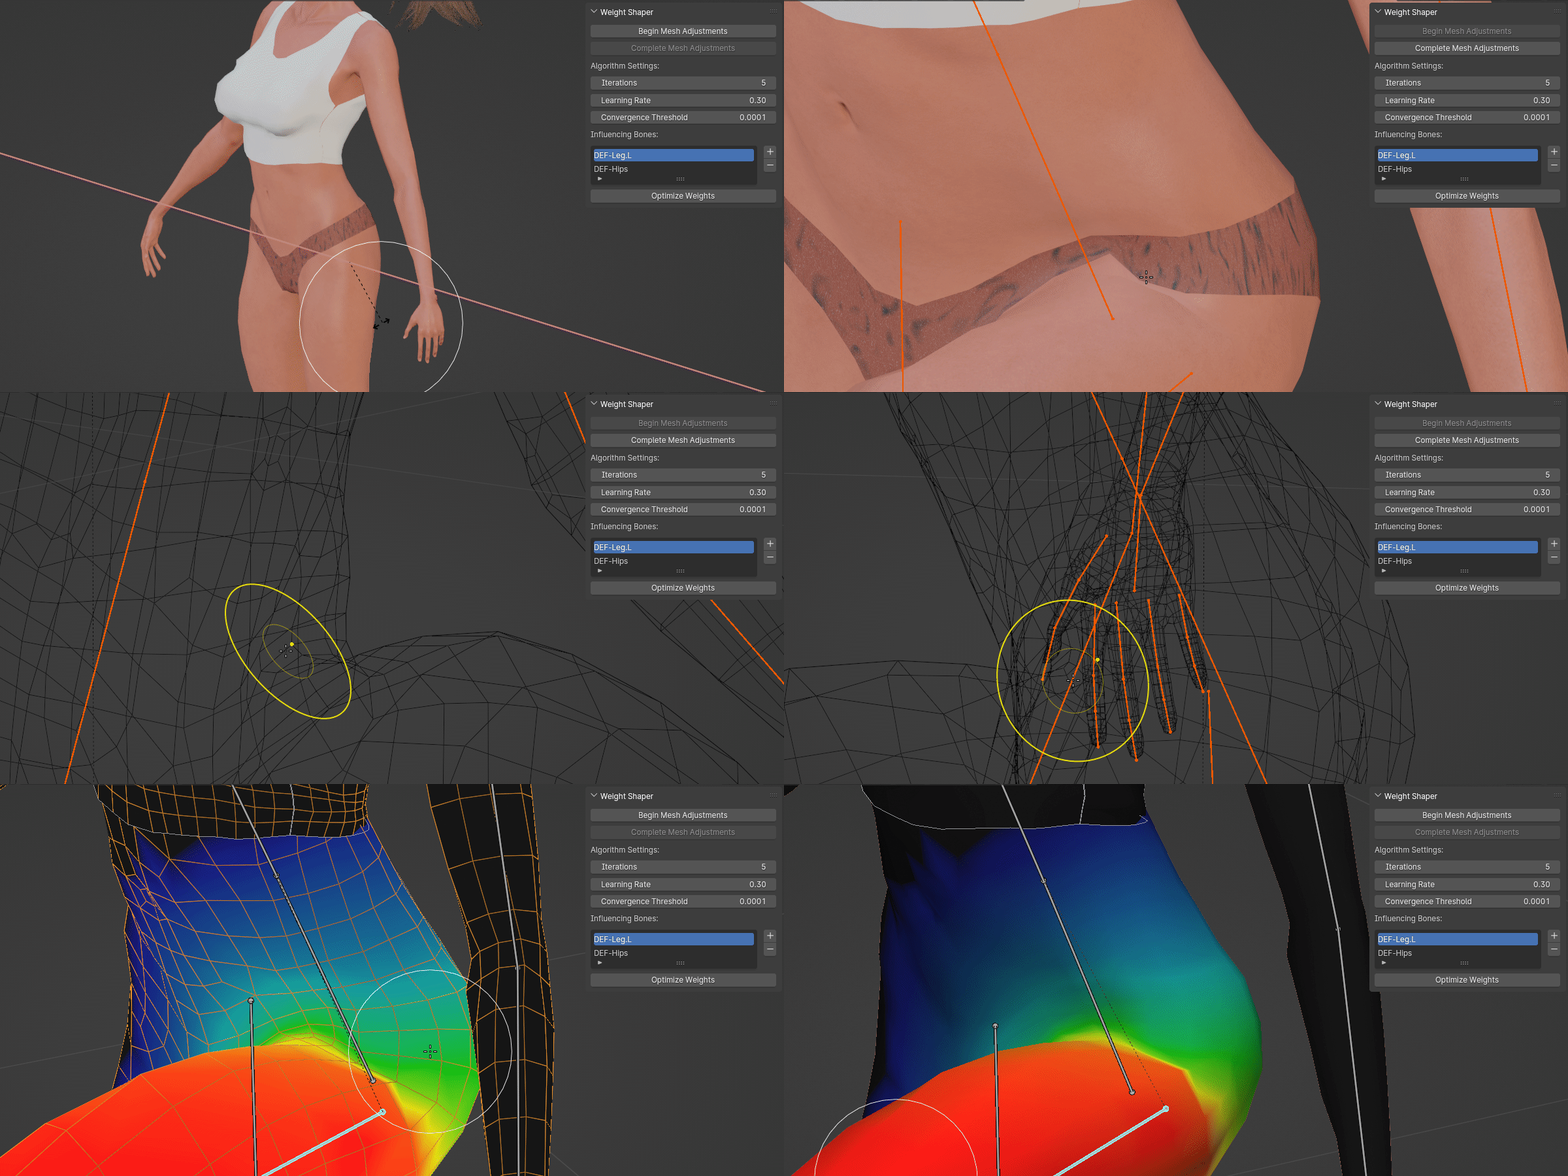
Weight Shaper gives you full authority over the weight painting process. Choose exactly which bones influence the weight distribution to achieve precise deformation control.
- Bones Selection: Easily specify the bones that the algorithm should use for weight splitting by adding them to the 'Influencing Bones' list.
- Normalized Weights: Post-optimization, the weights are normalized, ensuring consistent and accurate results without exceeding the total weight limit of 1.
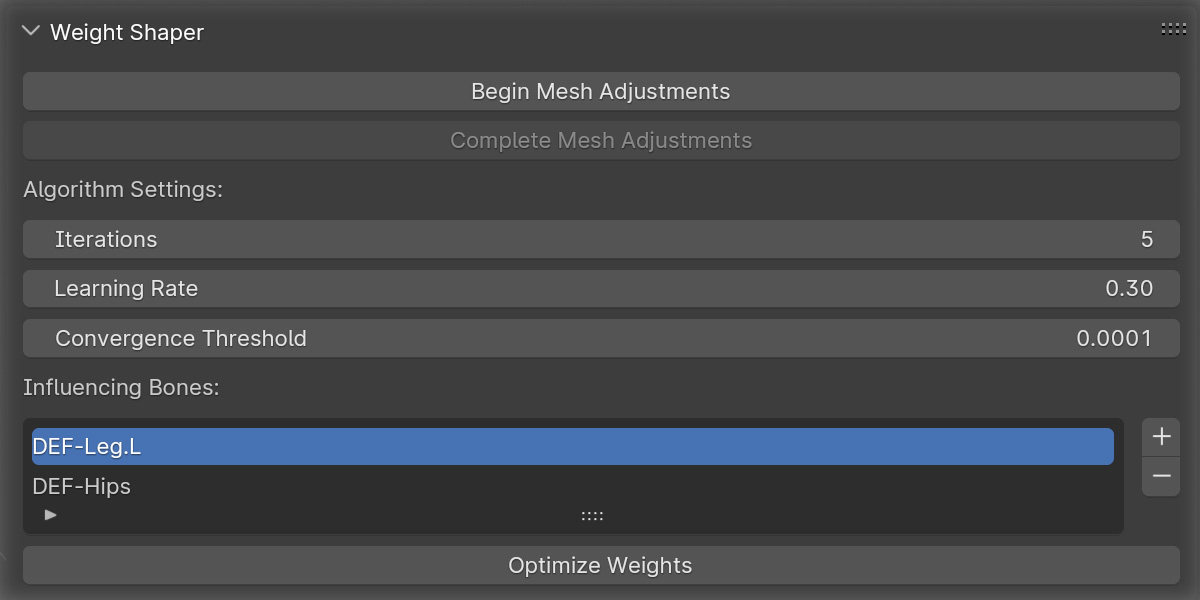
For those who love to fine-tune, advanced settings like Learning Rate, Convergence Threshold, and Iterations offer even more control. These settings are explained in detail in the documentation, allowing you to tailor the addon to your project's needs.
Effortless Precision in Weight Painting
Manual weight painting can be time-consuming. That's where Weight Shaper steps in. It's all about making your workflow faster and letting you adjust vertices with precision for that perfect pose. The addon does the heavy lifting by creating the weight paint for you.
Maximizing the Potential
To help you achieve the best results with Weight Shaper, here are some essential tips:
- Influencing Bones Selection: Any bone added to the "Influencing Bones" list is considered by the algorithm for weight optimization. It doesn’t matter if a bone is actively selected in the list; if it's there, it will be included.
- Adding Multiple Bones: For more effective results, try adding at least two bones to the "Influencing Bones" list. For instance, when adjusting elbow deformation, consider including bones like 'Arm' and 'Forearm'. This gives the algorithm more flexibility and potential in redistributing the weights.
- Strategic Bone Choice: When tweaking your mesh, think about which bones should most influence the area you're adjusting. For example, when working on the armpit area of a character, adding bones like 'Arm' and 'Chest' to the list would be beneficial. While the weights will primarily split between these two, if the adjusted vertices were initially influenced by another bone like 'Shoulder', their weights will still be adjusted due to the normalization process.
- Normalization Process: Remember, if a vertex that you've adjusted is influenced by bones not in the "Influencing Bones" list, their weights will still change due to the normalization process.
For a deeper understanding and practical examples, be sure to check out the 'Understanding Weight Distribution' section on the documentation page.
Additional Note on Performance and Responsiveness:
During extensive vertex adjustments, Blender may temporarily enter a 'no response' state. This is normal and expected due to the intensive nature of the calculations. The process is still active in the background, and Blender will resume normal operation once the calculations are complete. Please be patient during this process and rest assured that the optimization is proceeding as intended.
Discover More on YouTube
Check out Weight Shaper in action in my YouTube demonstration. Watch the video for a detailed walkthrough of how the addon works.
Check Out My Other Add-on: "Weight Paint And Bones: A Blender Toolkit"
If you're enjoying Weight Shaper, take a look at "Weight Paint And Bones: A Blender Toolkit". It enhances the default weight painting experience in Blender, especially with its ability to easily mirror weight paint on asymmetrical meshes. A handy tool for any Blender user looking to streamline their workflow.
Weight Paint And Bones: A Blender Toolkit
Changelog
Version 1.1.0:
-
Performance Boost: Substantially improved processing speed for weight optimization. Detailed tests indicate more significant time savings with increasing mesh complexity. Tests were conducted with default settings (5 iterations, 0.3 learning rate, 0.0001 convergence threshold) on exactly 50 adjusted vertices.
- Bone Selection Upgrade: Users can now add multiple bones to the "Influencing Bones" list at once in Weight Paint mode.
- Bone Selection Accuracy: Fixed an issue where the addon would occasionally add an unintended bone to the 'Influencing Bones' list.
- Shape Key Detection Fix: Fixed 'Failed to create shape key' error for non-English Blender versions.
- Error Handling: Enhanced error checks for smoother user experience.
-
Optimization Feedback: Enhanced 'Optimize Weights' with a completion notification and processing time detail.
Discover more products like this
vertex group bfcm23 skinning winter24 spring24 Deformation Fix Vertex Manipulation weight paint loveblender animation user friendly addon efficiency rigging armature Character rigging 3d modeling sculpting Blender Add-on


