Ninja Tracer
How to install?
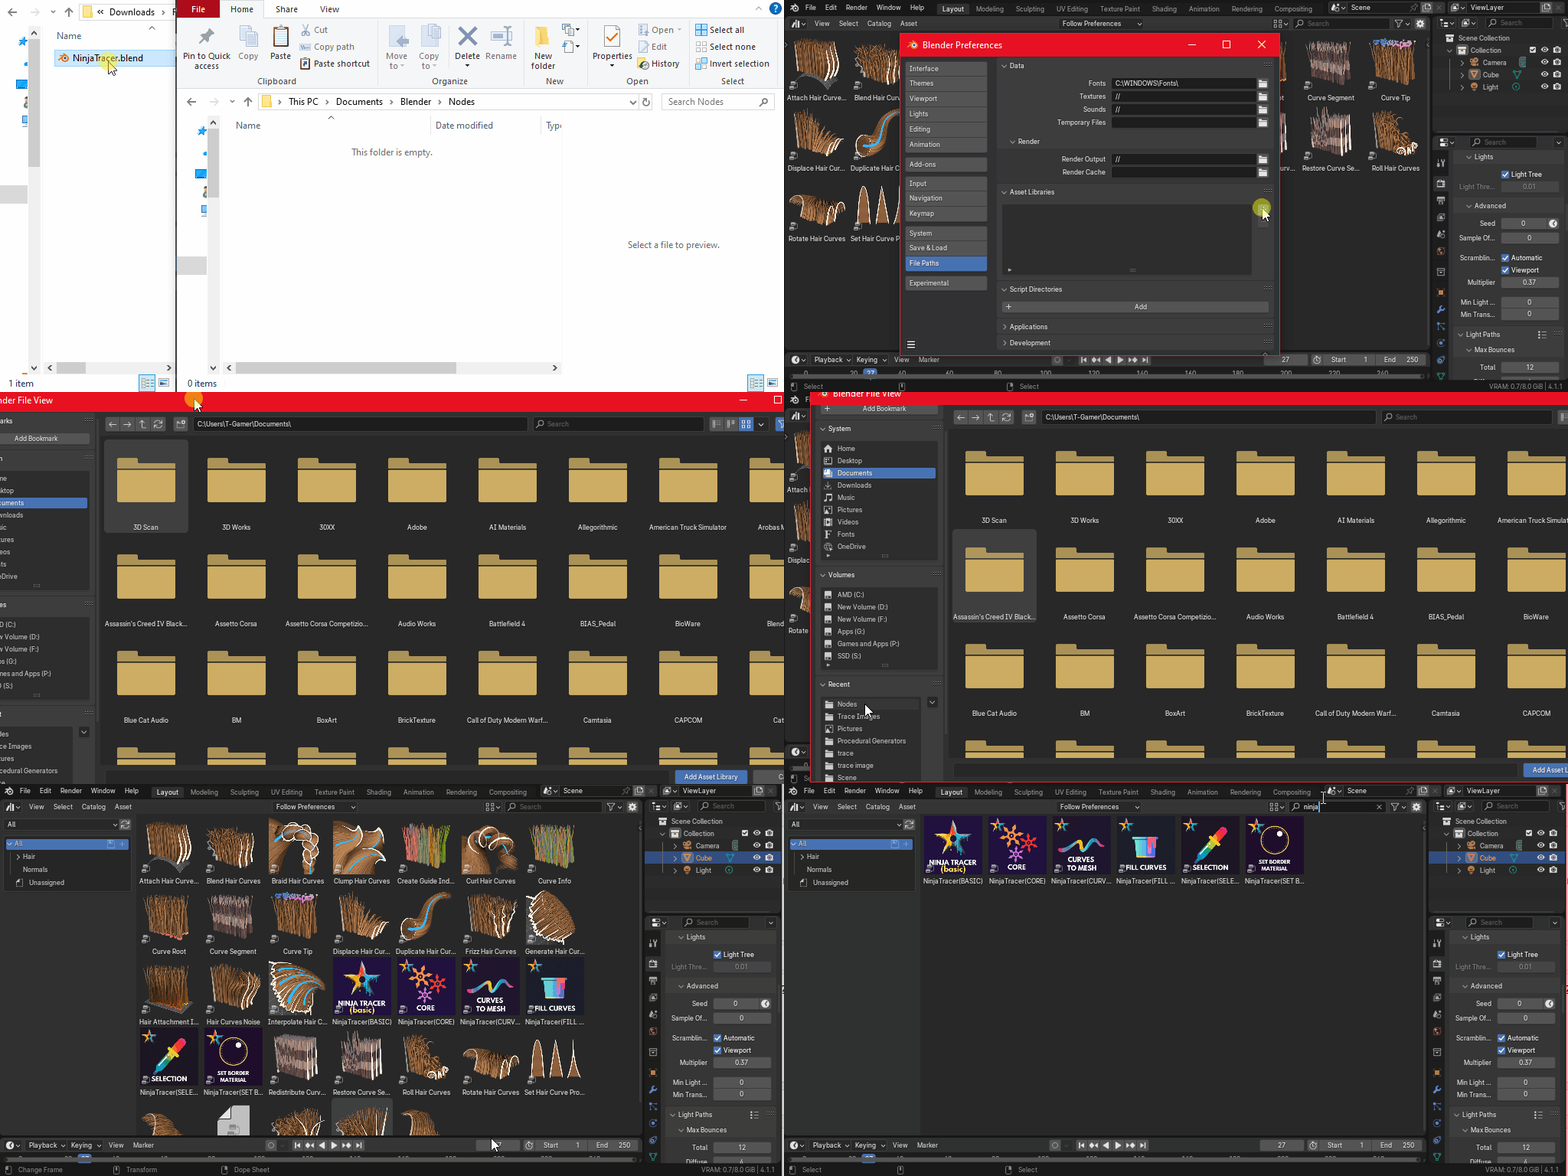
To install, you first need to add the file to your Assets Library folder.
After that, make sure that this folder has been added to the Assets Libraries.
If you have done everything correctly, you will be able to find all the modifiers in Blender's Assets Browser.
How to use basic mode?
Add any object to the scene
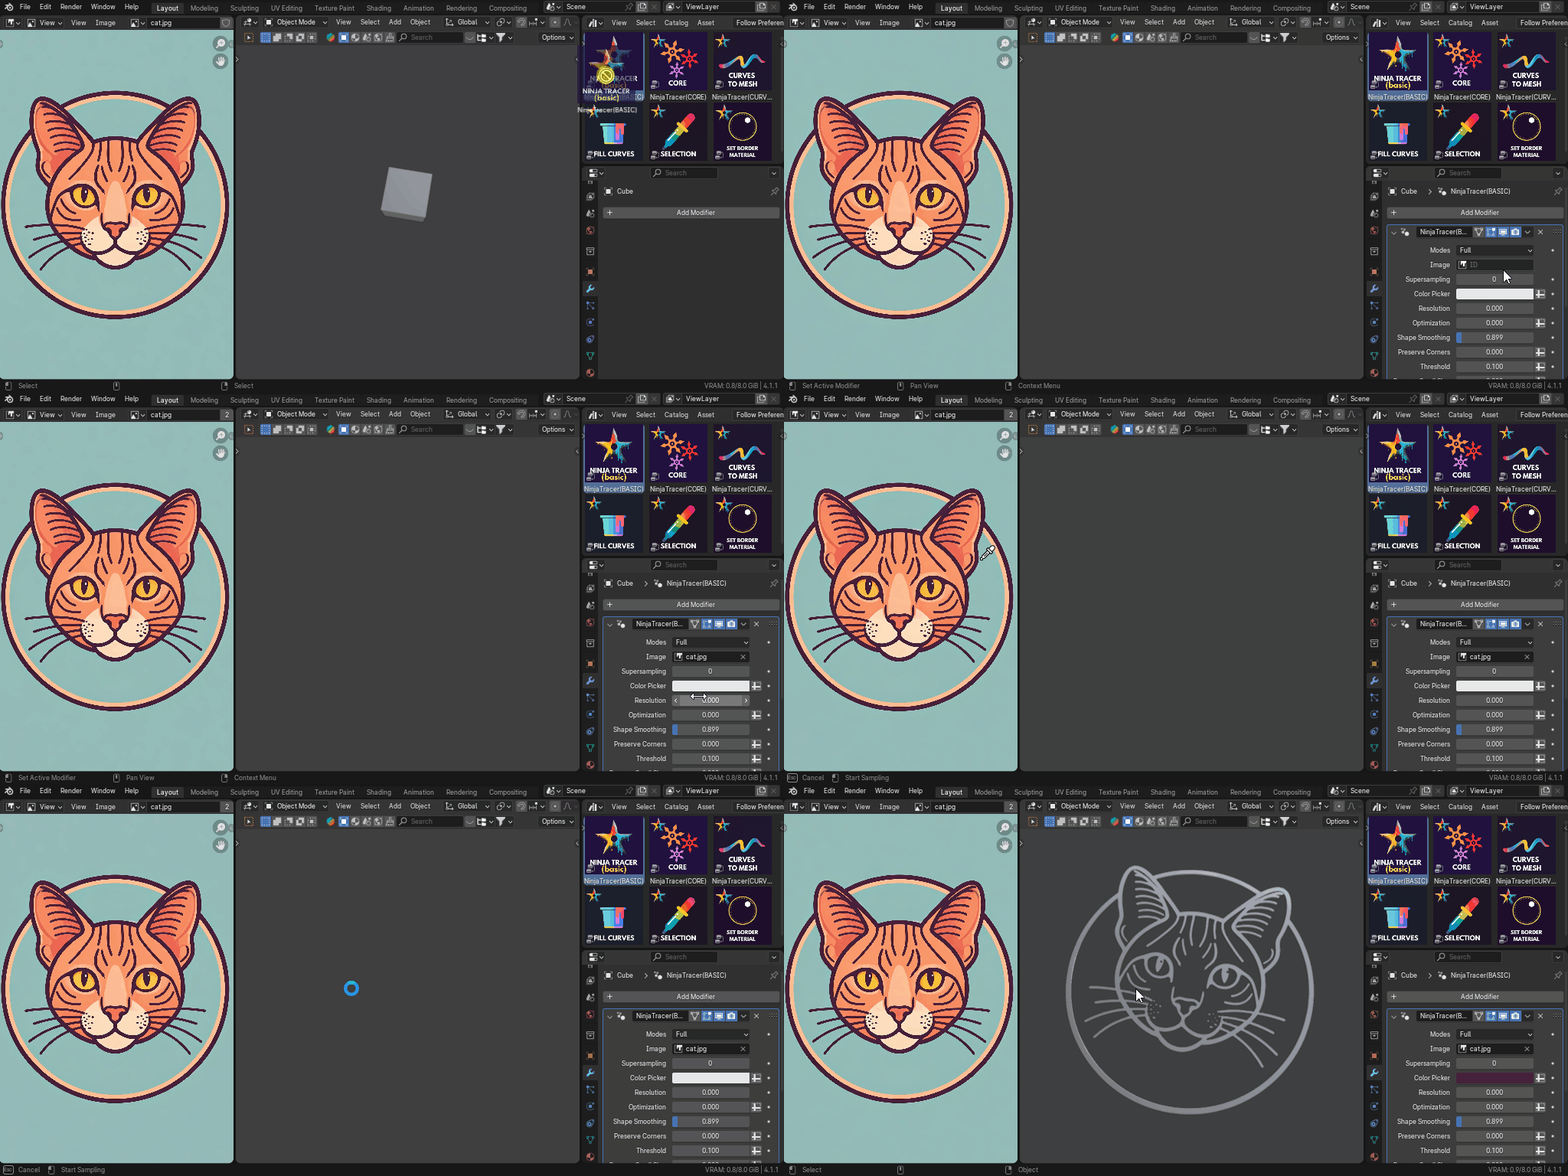
Open the Assets Browser and drag NinjaTracer(BASIC) on top of the added object.
Then, go to the Modifiers tab and find NinjaTracer(BASIC).
Go to the Texture tab and load an image or video there.
Go back to NinjaTracer and load the image or video in the "Image" input.
You can also access the advanced settings of NinjaTracer(BASIC) in the Geometry Nodes window.
How to use advanced mode?
In advanced mode, you will need to load the modifiers in a specific order.
First, add any object to the scene.
Open the Assets Browser and drag the NinjaTracer(CORE) node first.
(This modifier is where you will find the most important information about the program, such as texture input, quality settings, smoothness).
Next, go to the Modifiers tab and find NinjaTracer(CORE).
Go to the Texture tab and load an image or video here.
Go back to NinjaTracer and load the image or video in the "Image" input.
The second modifier you should add is NinjaTracer(SELECTION).
(This modifier will be used to select the colors that will generate the geometric shapes)
Drag NinjaTracer(SELECTION) on top of the grid generated by the previous modifier and make sure that NinjaTracer(SELECTION) appears in sequence in the Modifiers tab.
Open the Image Editor window and load the image you want to use for tracing.
Go back to NinjaTracer(SELECTION) and click on the Color Picker entry and use the Eyedropper tool to pick a color from the image.
You can duplicate this modifier as many times as you need to trace different colors separately.
The next modifier you need to add is NinjaTracer(FILL CURVES).
(This modifier takes the generated curves and converts them into 3D shapes with customizable borders.)
Drag NinjaTracer(FILL CURVES) on top of the grid generated by the previous modifier and make sure that NinjaTracer(FILL CURVES) appears in the Modifiers tab.
In NinjaTracer(FILL CURVES), select the fill mode from the Modes entry.
The next modifier to use is NinjaTracer(CURVES TO MESH).
(This modifier extracts the curves from the corners of the generated shapes and creates tubes from them).
Drag the NinjaTracer(CURVES TO MESH) on top of the grid generated by the previous modifier and make sure that the NinjaTracer(CURVES TO MESH) appears in sequence in the Modifiers tab.
The last modifier to be used is NinjaTracer(SET BORDER MATERIAL).
(This modifier is used to change the material of the edges using a selection of vertices in the Custom Profile or based on the center of the edges).
Drag the NinjaTracer(SET BORDER MATERIAL) on top of the grid generated by the previous modifier and make sure that the NinjaTracer(SET BORDER MATERIAL) appears in sequence in the Modifiers tab.
How to edit the NinjaTracer by Geometry Nodes?
Add any object to the scene
Open the Assets Browser and drag the NinjaTracer(BASIC) on top of the added object.
Next, go to the Modifiers tab and find NinjaTracer(BASIC).
Go to the Texture tab and load an image or video here.
Go back to NinjaTracer and load the image or video in the "Image" input.
Select the NinjaTracer(BASIC) modifier and open Geometry Nodes.
In Geometry Nodes you will find all the nodes in sequence and from here you can create new selections and shapes if you duplicate Ninjatracer(SELECTION) and place it after the existing NinjaTracer(SELECTION).
You can also explore the additional settings that are not visible in the Modifier within Geometry Nodes.
You can also drag nodes from the Asset Browser to Geometry Nodes if you want to add new nodes.
How to use NinjaTracer with curves and text?
(You can use NinjaTracer with curves, as long as they are flat on the z-axis and closed. To use it on text, you must first set the "Fill Mode" to "None").
Open the Assets Browser and drag NinjaTracer(BASIC) on top of the added object.
Next, go to the Modifiers tab and find NinjaTracer(BASIC), select the modifier and open Geometry Nodes. Find the NinjaTracer(CORE) NodeGroup and change the color of the object using the "Curve Color" entry.
Discover more products like this
vector text geometrynodes tracer pixel tracer image tracer ImageTracer logo-tracer blender-curves curves Vector Graphics curves geometry nodes pixeltracer