Bioxel Nodes
Getting Started
Currently only support Blender 4.0 or above, make sure you have the correct version of Blender.
Add-on Installation
For Blender 4.2 or higher
Download the Extension version BioxelNodes_Extension_{version}.zip from https://github.com/OmooLab/BioxelNodes/releases/latest
In Blender, Edit > Preferences > Extensions > Install from Disk, select the zip file you just downloaded.
Thats it!
If it cannot be enable, just reboot blender.
For Blender 4.0 or 4.1
Download the Addon version BioxelNodes_Addon_{version}.zip from https://github.com/OmooLab/BioxelNodes/releases/latest
In Blender, Edit > Preferences > Add-ons > Install, select the zip file you just downloaded.
The add-on requires a third-party python dependency called SimpleITK, click Install SimpleITK button below to install the dependency. After clicking, blender may get stuck, it is downloading and installing, just wait for a moment. After that, click Reboot Blender button.

This step may have failed due to network factors, just click "Set PyPI Mirror" to change the mirror.
Prepare Your Data
First you need to have your volumetric data ready. If not, you can access open research data from list below.
Note that just because they are open and available for download does not mean you can use them for anything! Be sure to look at the description of the available scopes from website.
| Source | Object |
|---|---|
| Dryad | Open Research Data |
| OpenOrganelle | Cells |
| Embodi3D | Medical Images |
| Github | Medical Images |
| NIHR | Medical Images |
| Medical Segmentation Decathlon | Medical Images |
| Allen Cell Explorer | Cells |
| Visible Human Project | Medical Images |
Import Volume Data
File > Import > Volume Data as Bioxel Layer, select one of the .dcm files and click on "Volume Data as Bioxel Layer" (you can also drag one of the .dcm files directly into the 3D viewport to trigger the import)

It may take a while to read data. After finishing reading, it will pop up a dialog box. Ignore all the options, just click OK (we will tell about these options later).
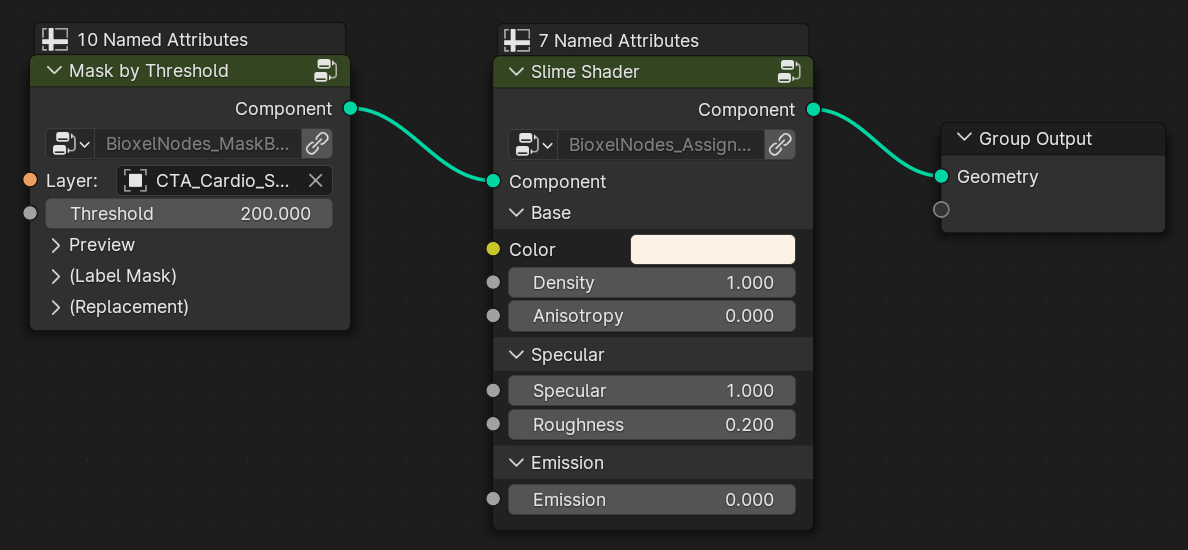
After importing the data, the add-on will automatically add the necessary nodes to build the component. Click on the new created object in outliner, open the geometry nodes panel, set Threshold in "Mask by Threshold" node to 200, and then connect a Slime Shader node (Add > Bioxel Nodes > Slime Shader) after it. The node graph should be as following:

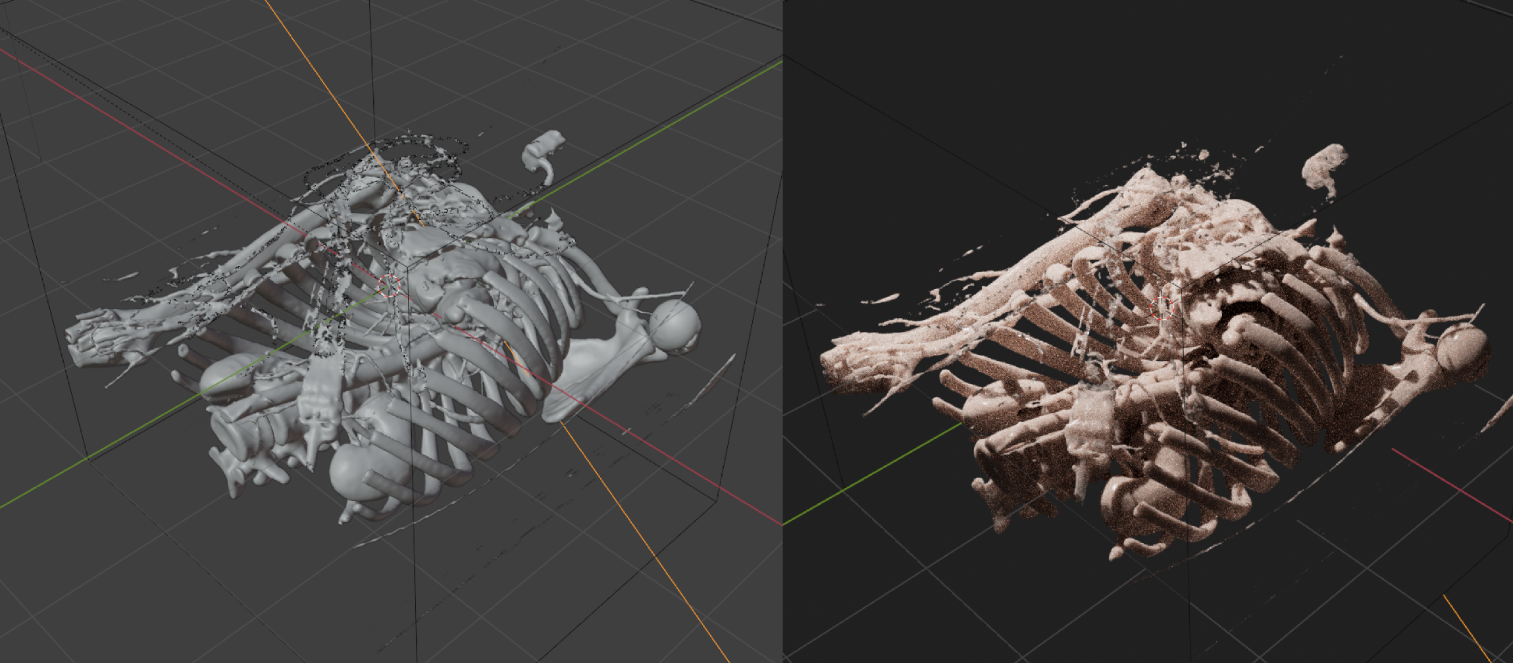
and then turned on the cycles rendering to directly see the result.

You can change the "Threshold" to modify the preview model, or change the "Color", "Density" to modify the shader effect. All the parameters are straightforward, you can understand them by changing the values.
Share Your File
The VDB cache and the Bioxel nodes are not reachable to other computers if you don't save them. If you want to give your blender file to someone else, you will need to perform the following steps first:
- Save your blender file
- Click Scene > Bioxels > Save All Bioxels in the properties panel.
- Click Scene > Custom Nodes > Save All Custom Nodes in the properties panel.

After that, both the VDB cache and the Bioxel nodes are restored in relative locations. When you share this file with someone, pack the entire directory so that the resources will be not lost. The other person will be able to open it correctly, regardless of whether they have Bioxel Nodes installed or not.