Align And Distribute
Align:
Aligning has two methods: Origin and Bounding Box.
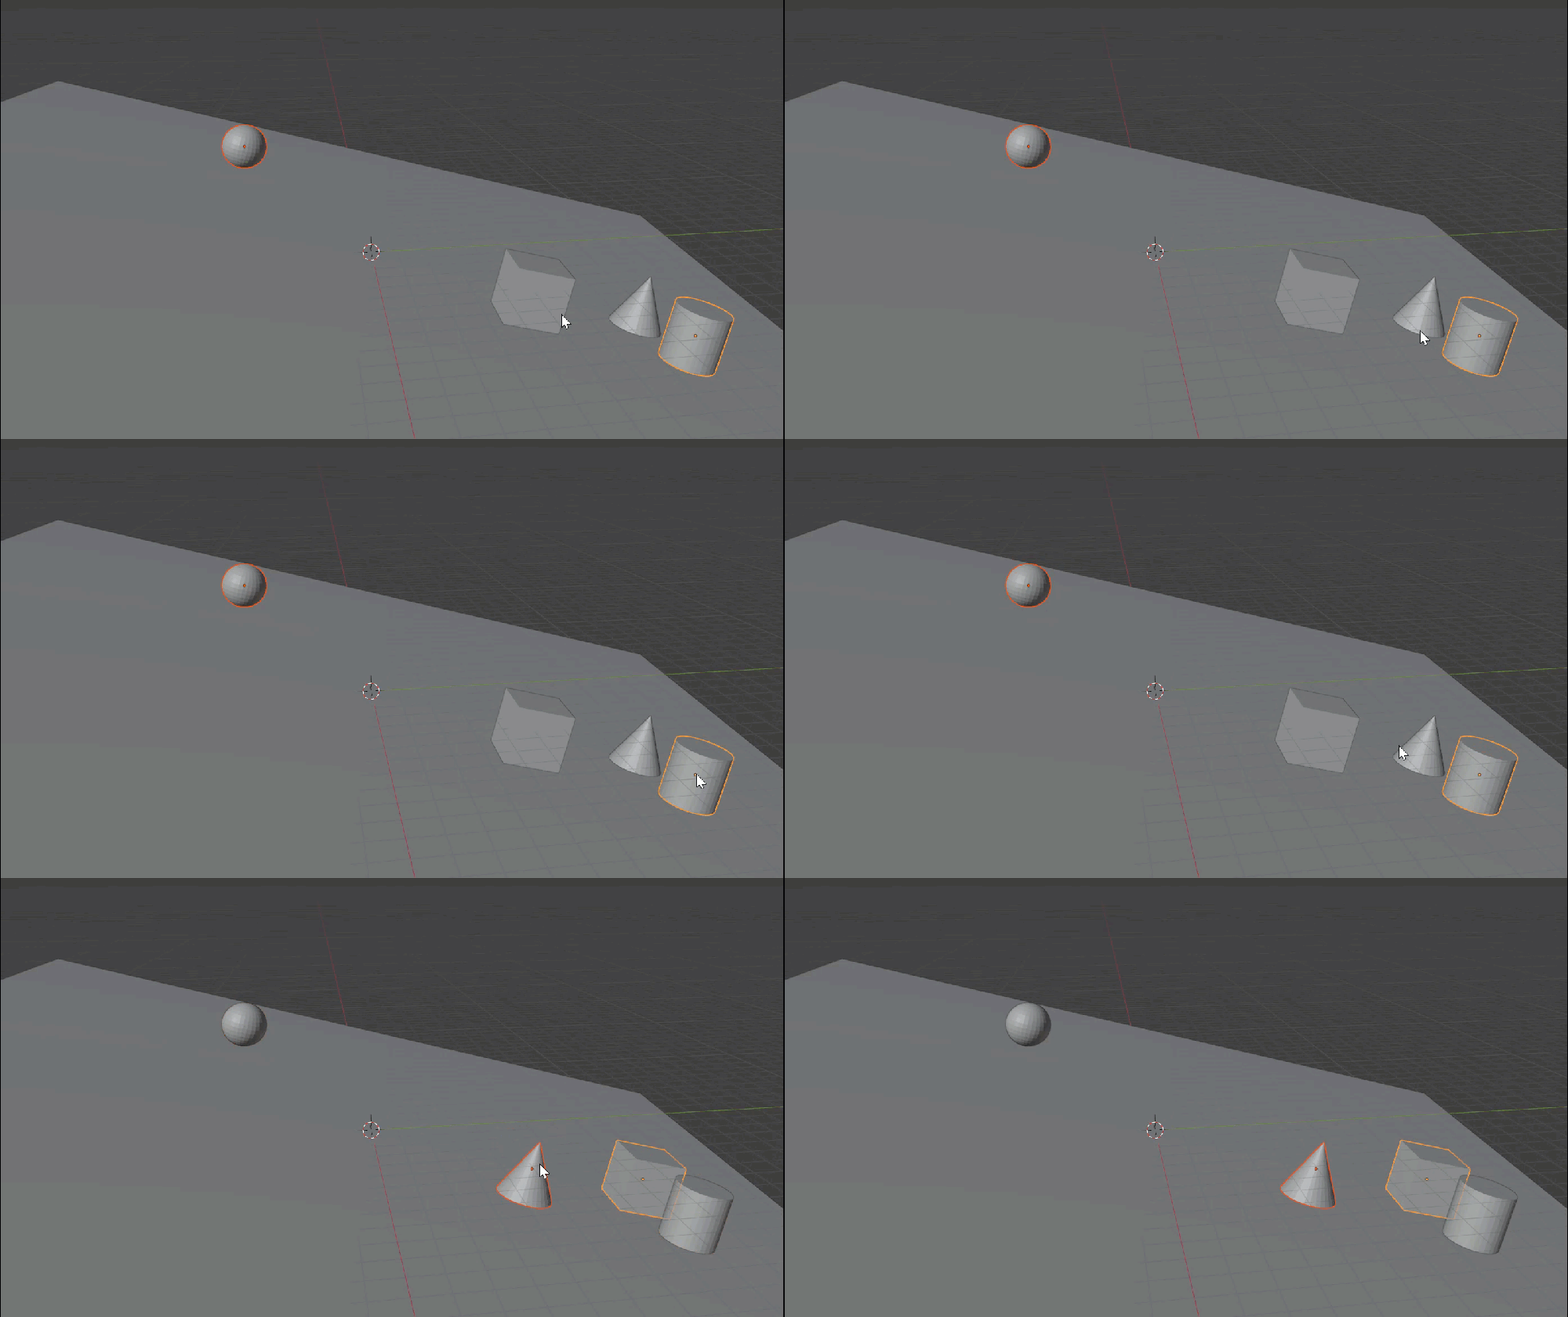
When you set the method to 'Bounding Box' more options become available.(See Gif Below)
Select the Axis on which you want to align the objects.
Use the lower-left panel to add or remove more axis or to change any other parameter.
Objects can be distributed into 1 Dimension (Linear) or 2 Dimensions (Grid)
1D:
1 Dimension distribution also has two methods: Origin and Bounding Box. And similar to Align when you use the Bounding Box method more options become available.
Select the Axis along which you want to distribute the selected objects.
Objects will be distributed between the first and the last object along that axis.
Quick Distribute:
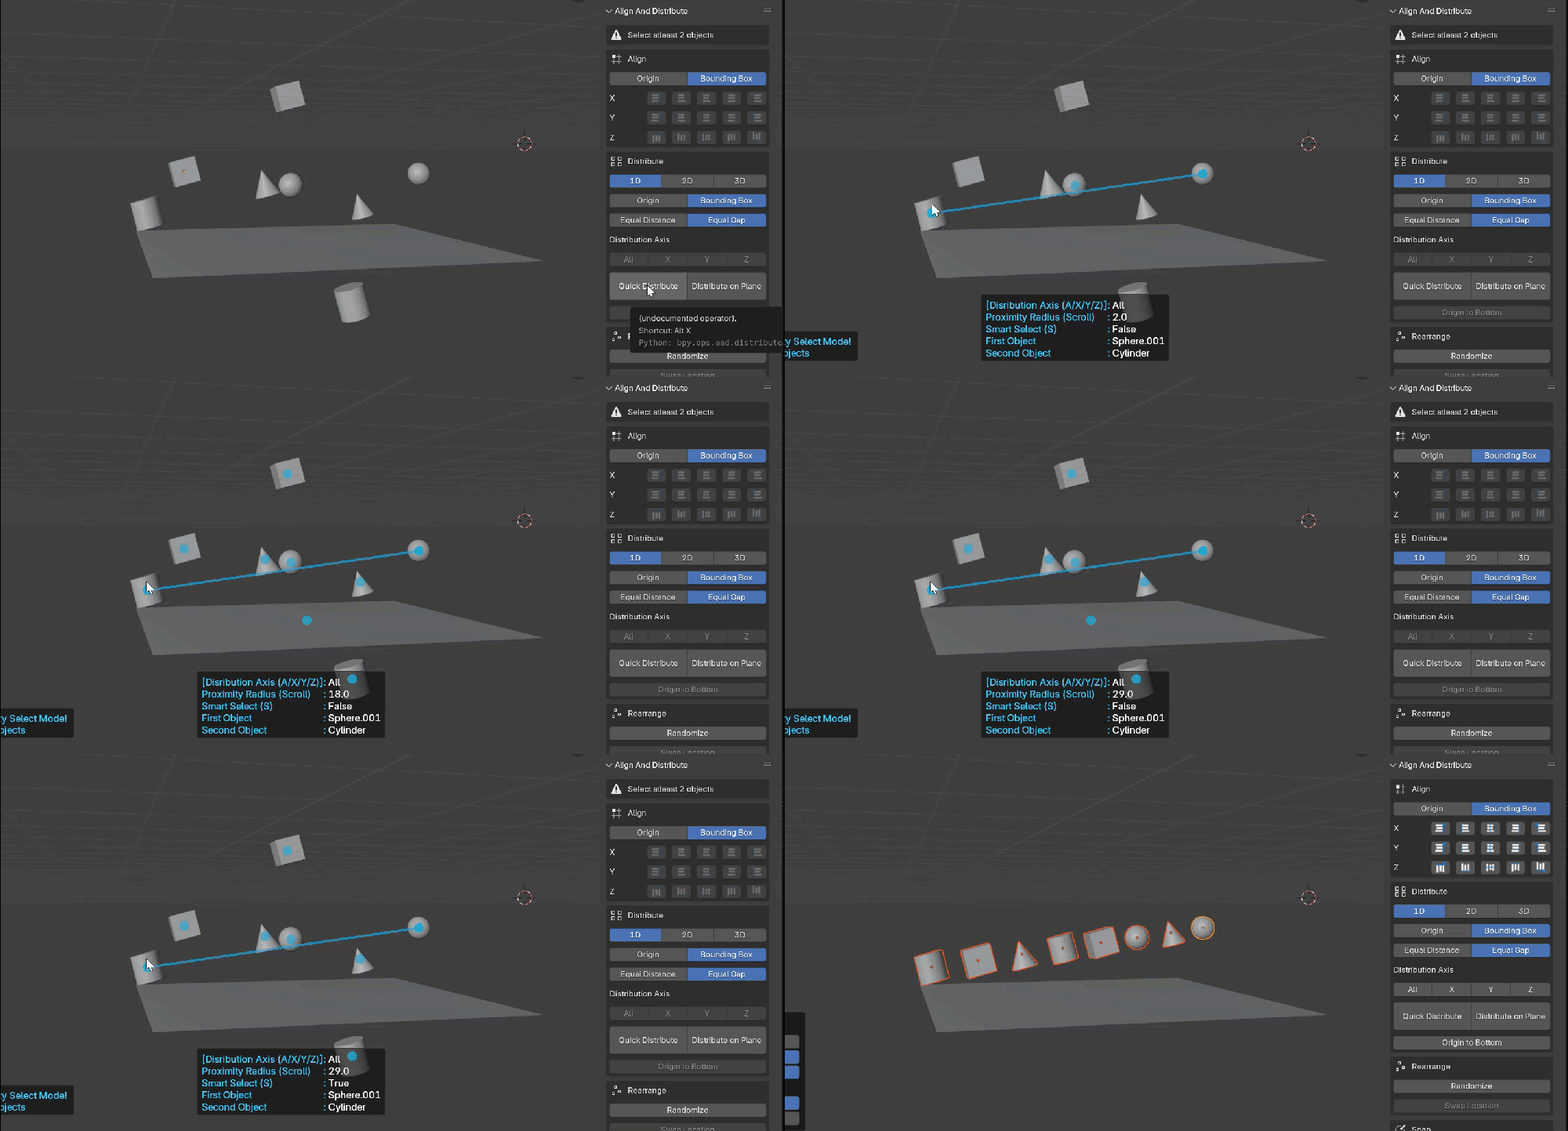
This function allows you to quickly distribute objects between two specific objects, unlike the normal distribute function, which uses the two farthest objects. Select all the objects you want to distribute and click "Quick Distribute." An on-screen UI will appear with relevant information.
Click on the two objects you want to distribute between, and the function will execute. You can adjust the distribution settings in the Lower Left Panel, similar to the normal distribute function.
Proximity Select:
If fewer than three objects are selected, it will automatically switch to proximity select mode, selecting all objects within a specified radius of the two corner objects. Adjust the radius by scrolling with your mouse wheel. Objects within proximity will be highlighted with a blue dot.
Smart Select (S):
When Smart Select is enabled, the addon will ignore larger objects (those more than three times the size of the first object you select) during proximity select, ensuring that only similarly sized objects are chosen.
See the example below of how the big plane was ignored even when it was in the proximity radius:
Distribute on Plane:
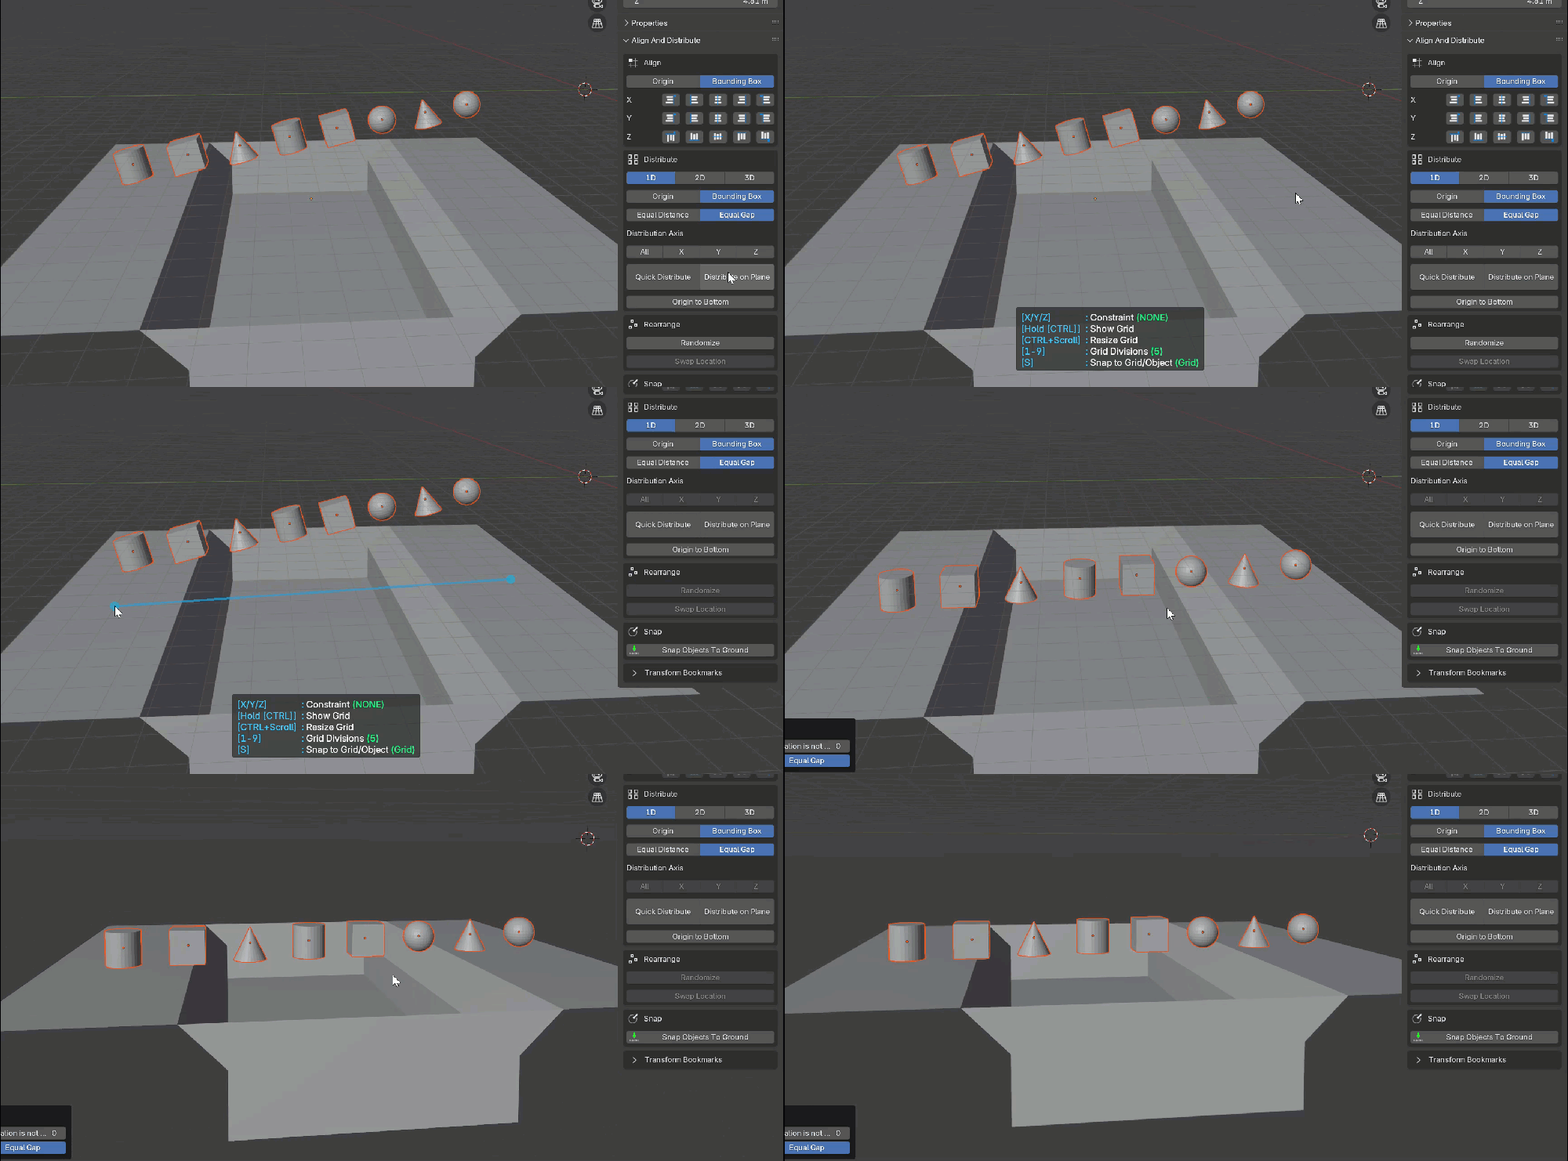
Similar to Quick Distribute, this function allows you to distribute selected objects on any plane by clicking on two surface points (both points must lie on the same plane in 3D space).
- Snap to Grid: Hold down CTRL to view and snap to grid points for accurate distribution.
- Scale Grid: Hold CTRL and use the mouse wheel to scale the grid.
- Grid Subdivision: Press keys 1-9 to set the number of grid subdivisions.
- Snap to Grid/Object: Choose whether objects should snap to the grid plane (a fixed 3D plane represented by the grid) or to the underlying surface of an object.
See the example below for a visual demonstration.
Snap to Grid:
Snap to Object: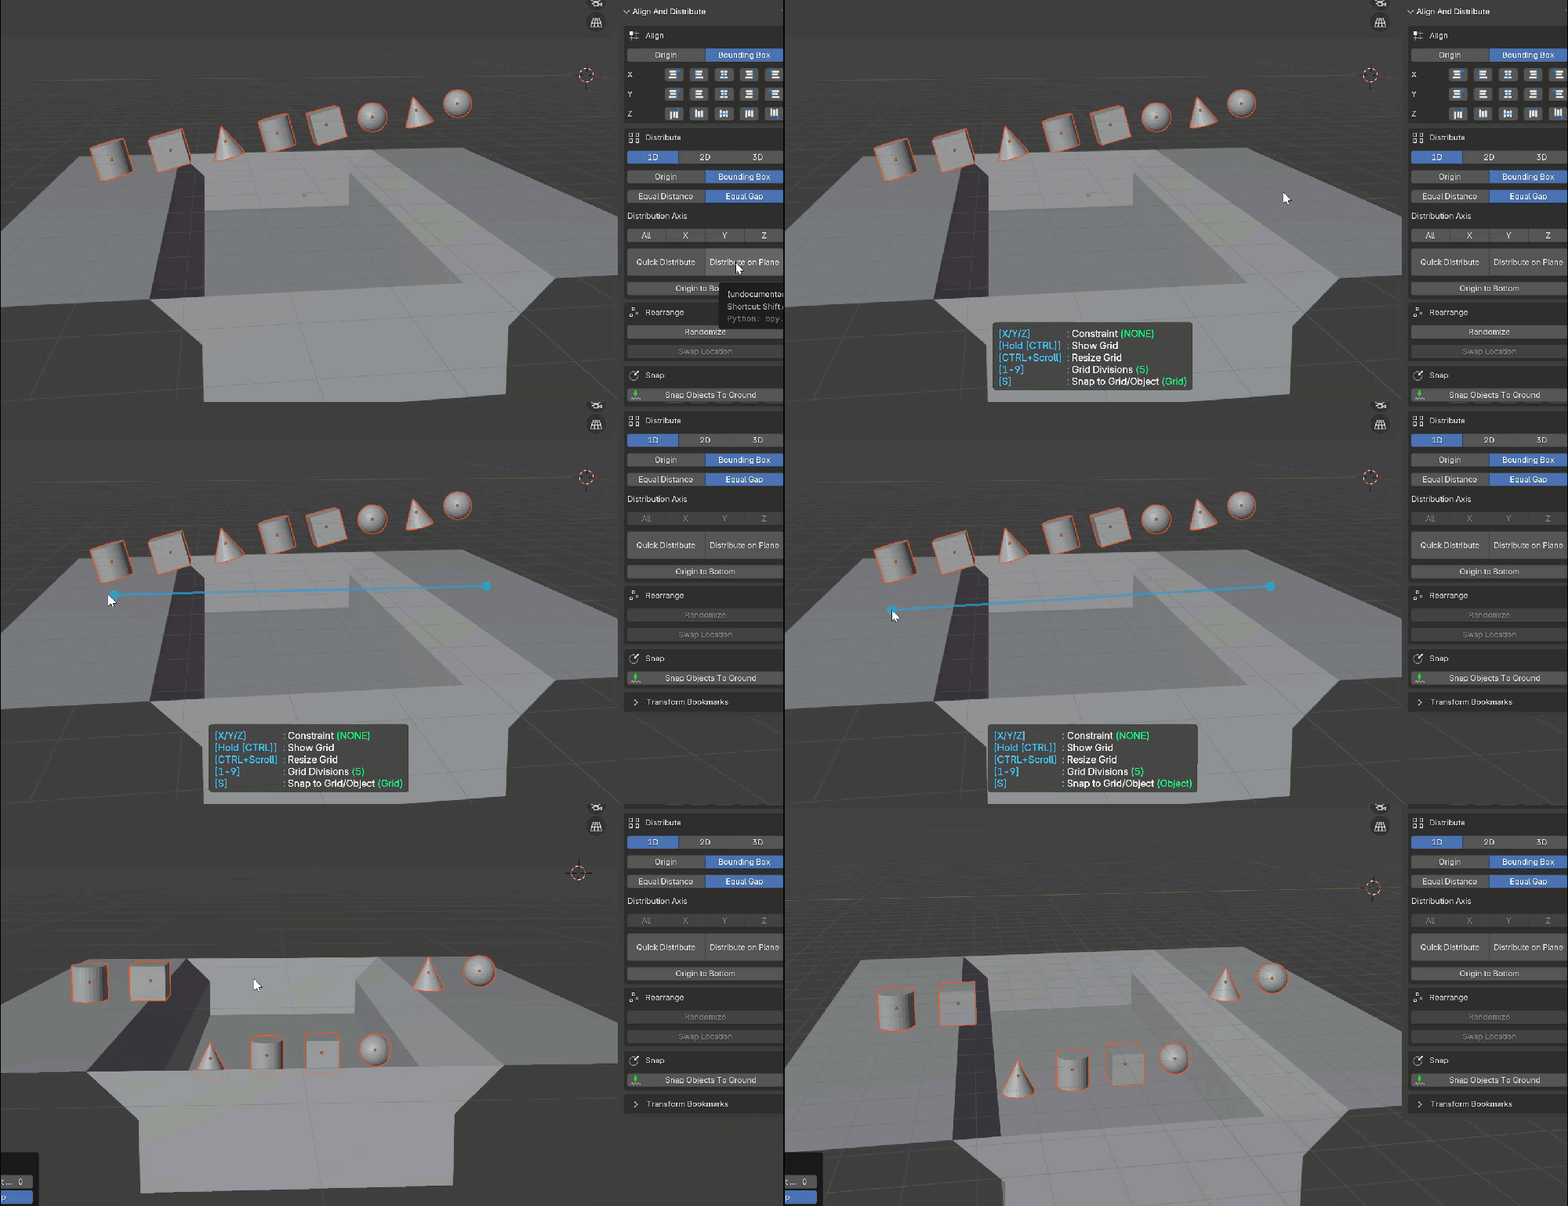
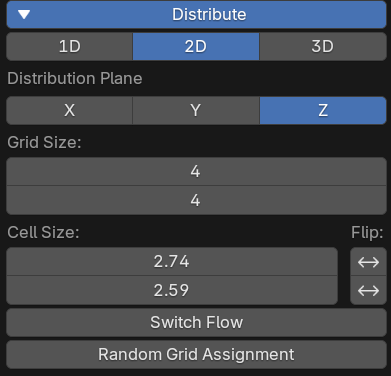
2D Grid Distribution:
Set the grid size (number of cells) and cell size, then choose the plane on which to distribute the objects in a grid.
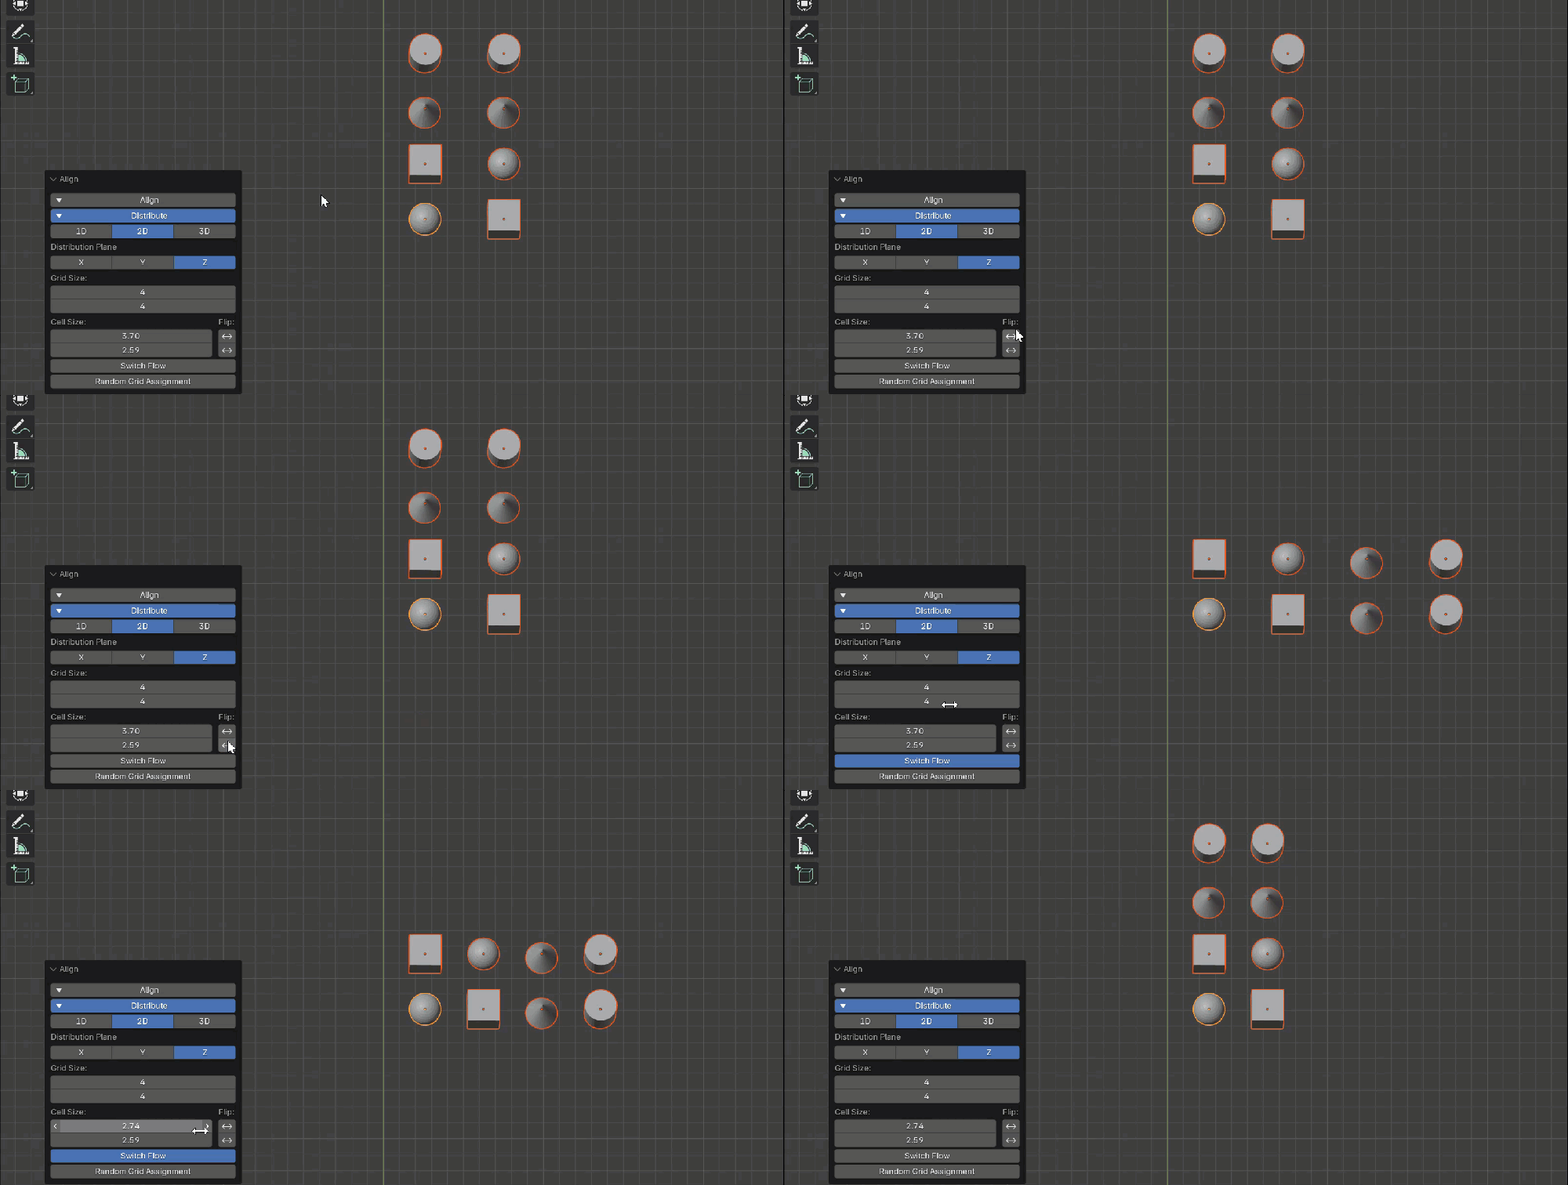
- Flip: Toggle the flip switch next to cell size to reverse the direction, or simply set the size to a negative value.
- Switch Flow: By default, objects fill the grid column-wise. To fill row-wise instead, toggle this option.
- Random Grid Assignment: Objects will be randomly assigned to grid cells. If the number of cells exceeds the number of selected objects, some cells will remain empty.
See the GIF below for an example.
Randomize Existing Locations:
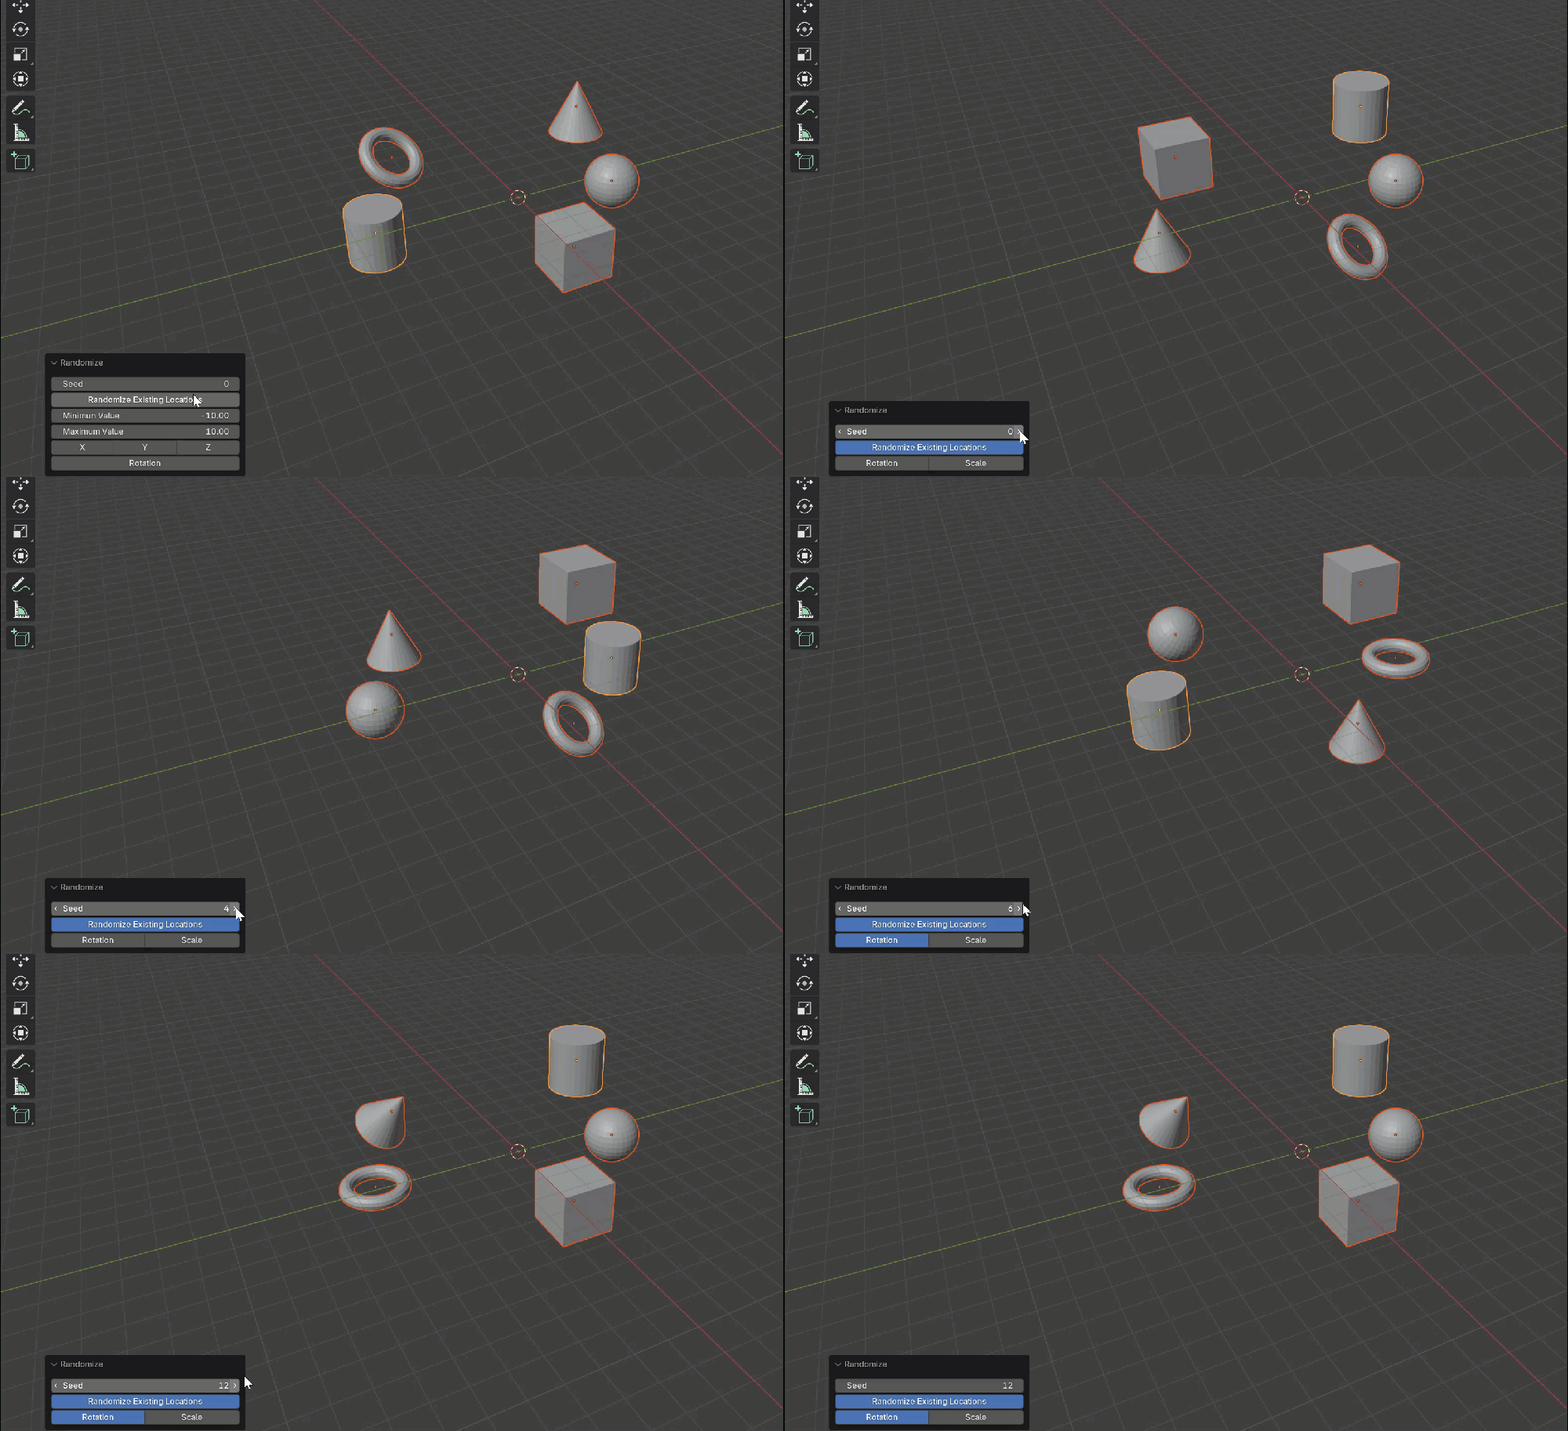
Randomly swap the locations of the selected objects. Optionally, you can choose to also swap their rotation and scale.
Randomize on Axis:
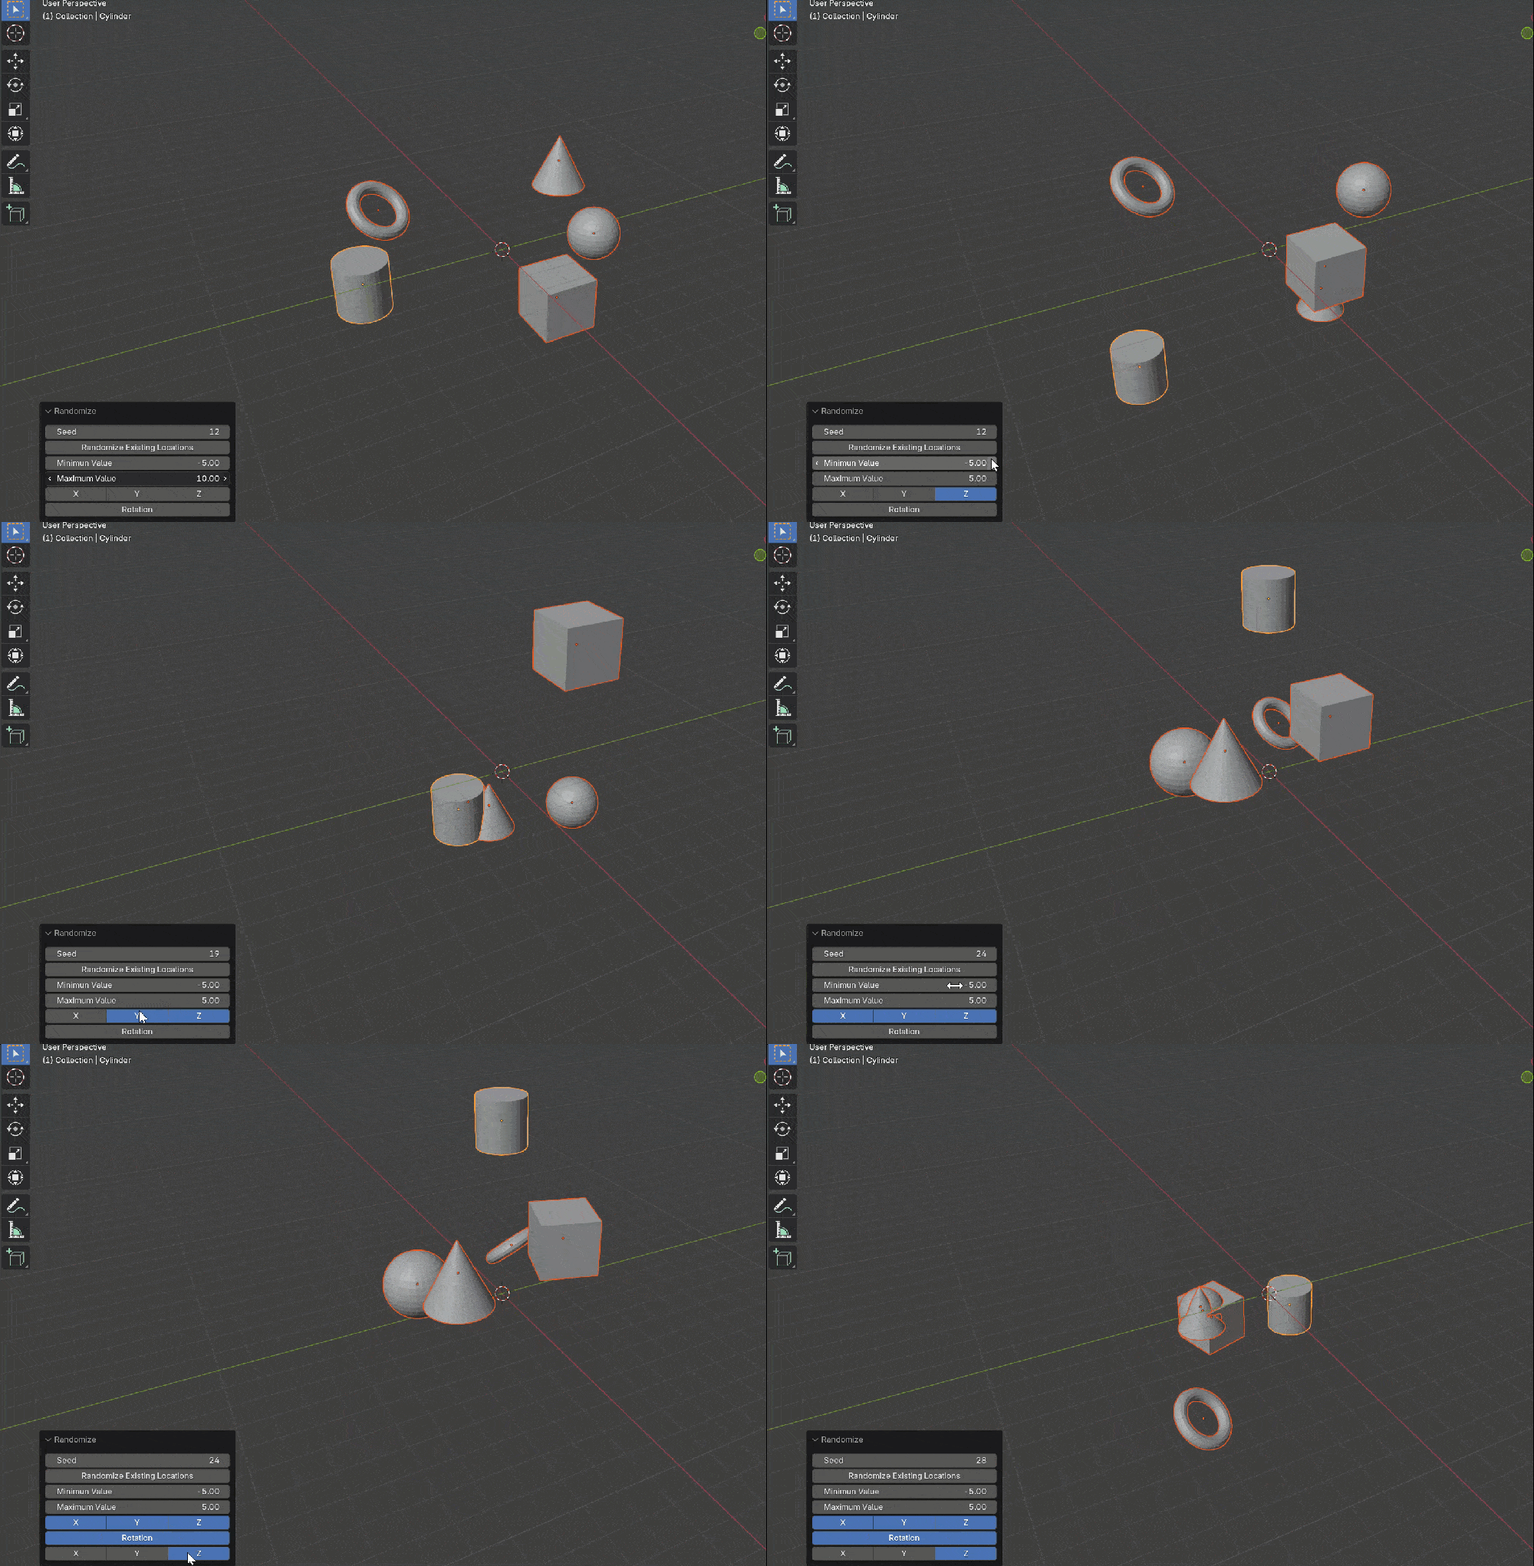
Randomize the location along the selected axes. The minimum and maximum values define how far the objects will move on those axes. To ensure random movement in both positive and negative directions, set the minimum value to the negative equivalent of the maximum value.
Swap Location:
Quickly Swap the location of 2 selected objects. Shortcut key: SHIFT+ALT+S
